
On my first outing with my underwater camera housing, I had no idea where to go. I knew the water had to be semi-clear, but I had no idea just how clear. Could there be a little murkiness? Would I maybe actually like the murkiness? How much was too much to where it would distort the image? I had no idea. So the first place I went was to Lake Elmo, a spot right here in Billings. Granted, it’s known as a giant mud puddle to locals, but I needed to start somewhere. I recruited my boyfriend’s mom, Eddy, to come hold the camera while I attempt to model underwater.
Turns out, Lake Elmo was not the best place to start. The water was so murky I couldn’t see anything more than 6 inches in front of my camera. One hour of work down, no results. Next location.
Spot #2 was the river. I figured with moving water, the fine muck and mud would be washed downstream and the water would be fairly clear. I was even curious to see what the motion would look like. But alas, it was still too murky. I could see a vague blur of color where the subject was, but there still wasn’t anything I could possibly edit. I’m still in search of a deeper part of the river where the dust and mud can settle, but for now I needed another option.
I’d already taken pictures at the pool, but everything had that blue tint. I thought it was just the background of the pool itself, so I brought a variety of backgrounds. As it turns out, the blue tint is because of the chlorine. It can taken out in post, but it’s definitely quite the process. I needed an unchlorinated spot.
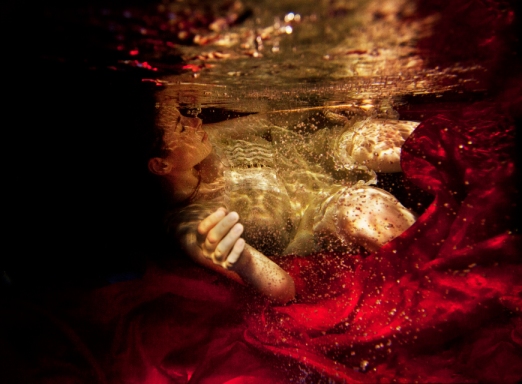
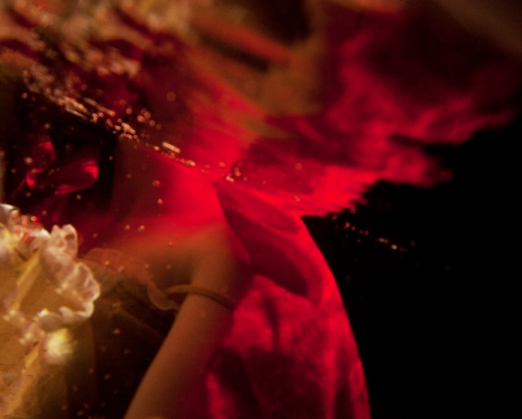
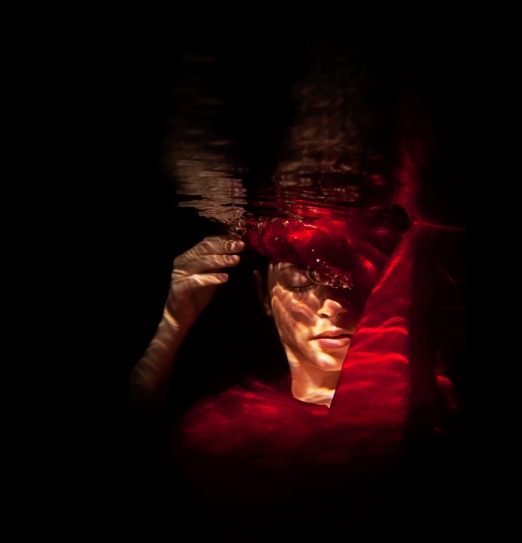
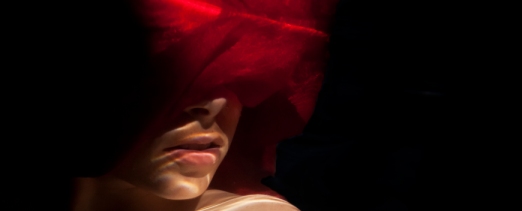
Eddy explained that we could try her hottub. It was tiny, but it was unchlorinated. Sure we were going on 3 hours of wasted time and I was unsure of whether or not I could even get a photo in a tiny space, but we had to try. So I put a wide angle lens on my camera, submerged myself in barely 1′ of water and clicked away. And these were a few of the results :).
Feel free to click here if you’d like to learn a little more about how I made my underwater camera housing :).
www.jennamartinphotography.com


Tatiana Lumiere
nice edit! love all of them. first one is – omg! How do you like to position your light(s)?
jennamartinphoto@gmail.com
Thanks Tatiana! In these ones the lights were all positioned above the water and in front of the subject. That’s what creates the rippled effect. Lights positioned underwater is what creates the “glowing” effect :).
Karen
Gorgeous!! I cannot believe that was your first try. I have so many buttons on the back of my housing that I haven’t figured half of them out. And not having anywhere to get underwater doesn’t help either.
jennamartinphoto@gmail.com
It’s definitely a challenge, Karen! But it’s crazy addicting too – I’m sucked in for life now! 😀